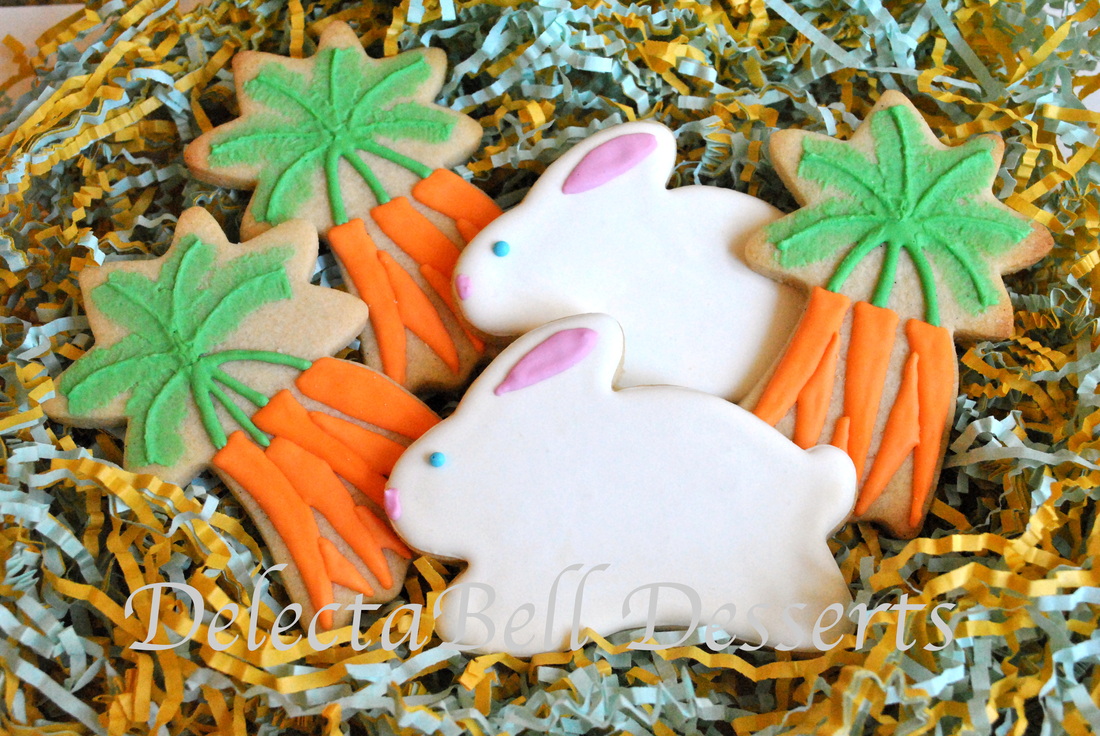
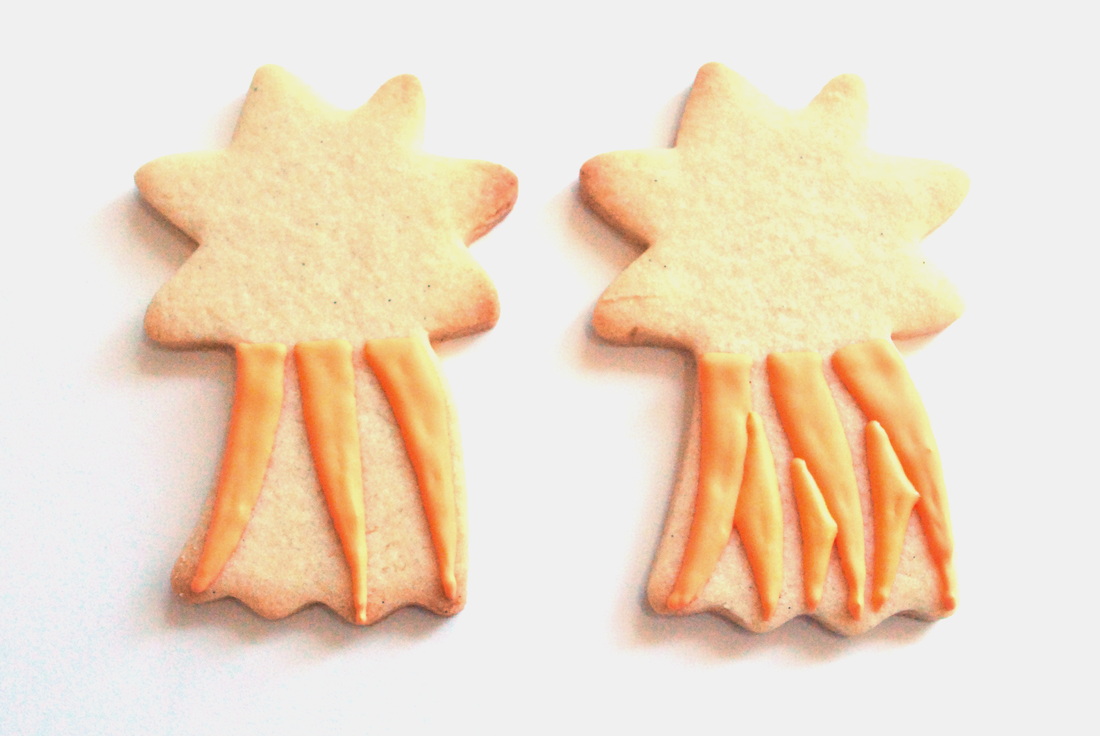
It's almost Easter and that means Easter cookies! I thought I'd do a quick tutorial on some very easy carrot bundles. I started out planning to do this a bit differently than they turned out. The tops of carrot stalks are sort of hard to imitate, they're not quite fuzzy but have so many parts to the leaves that you really can't do them individually. I sketched these cookies out planning to use stiff icing to make the tops using squiggly lines, but once I started doing that it really looked awful! So, I grabbed my trusty paint brush and went to work. But I'm getting ahead of myself, let's start at the very beginning ( *sing with me!* it's a very good place to start...).
This year I wasn't keen on doing individual carrots, they just didn't excite me but I loved the idea of a bunch of carrots, only problem was that I didn't have a cutter for that. So, after sorting through my boxes I settled on this shooting star, pointed bottom for carrots and the star part for the leaves. What you'll need:
1-baked cookies, use the shooting star or whatever else you think might work
2-orange and green 20 second icing (you can use whatever tip you like, I used PME 1.5 tips)
3-paint brush
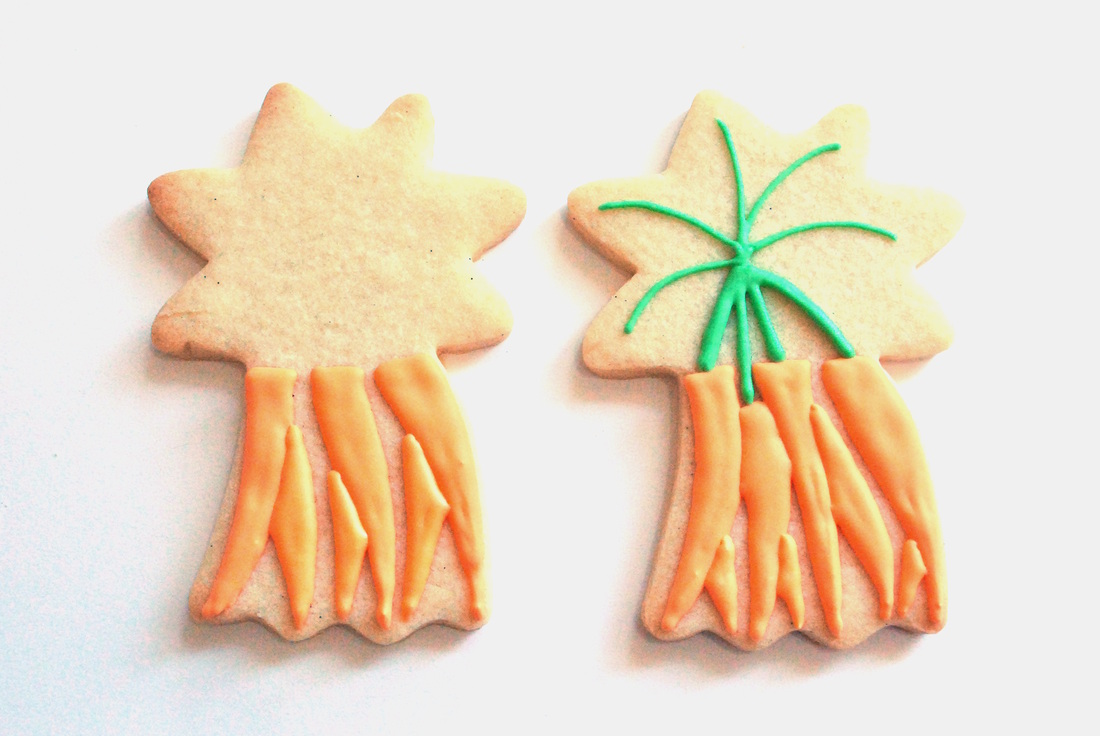
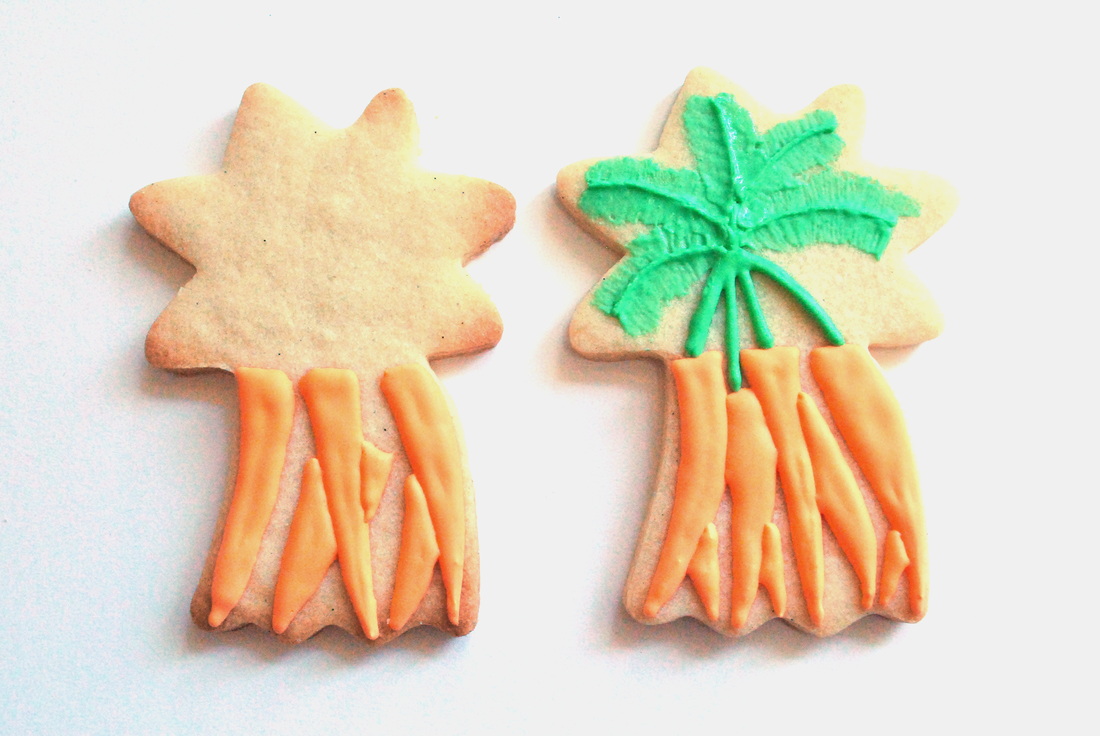
To start, simply pipe a few carrots onto the bottom part of the cookie with your orange 20 sec icing. Easy-peasy. They don't need to be perfect, have you seen real carrots from the garden? They're all different and potentially funky looking. We grew carrots that looked like toes ones year, they boys LOVED them! Let those sit for a bit, I can't remember how long I let them dry, long enough to be Capt. Hook and chase my little Peter Pans around the yard for a while. Then go back and add some more carrots to look like they are underneath the first ones. Next, grab your green icing and draw some stems coming up from the carrots, make them meet somewhere in the middle of the star part of the cookie. Then draw some lines going out from there to the points. For the next step you'll need your paintbrush handy. Pipe a green line on either side of your green lines that go towards the points, does that make sense? Then take your dry brush (I used a pretty big one) and pull/brush the icing outward. Again, this does not have to be perfect, you sort of want a highly textured and messy look to it. Do one part at a time, you don't want the icing to dry before you have a chance to brush it.
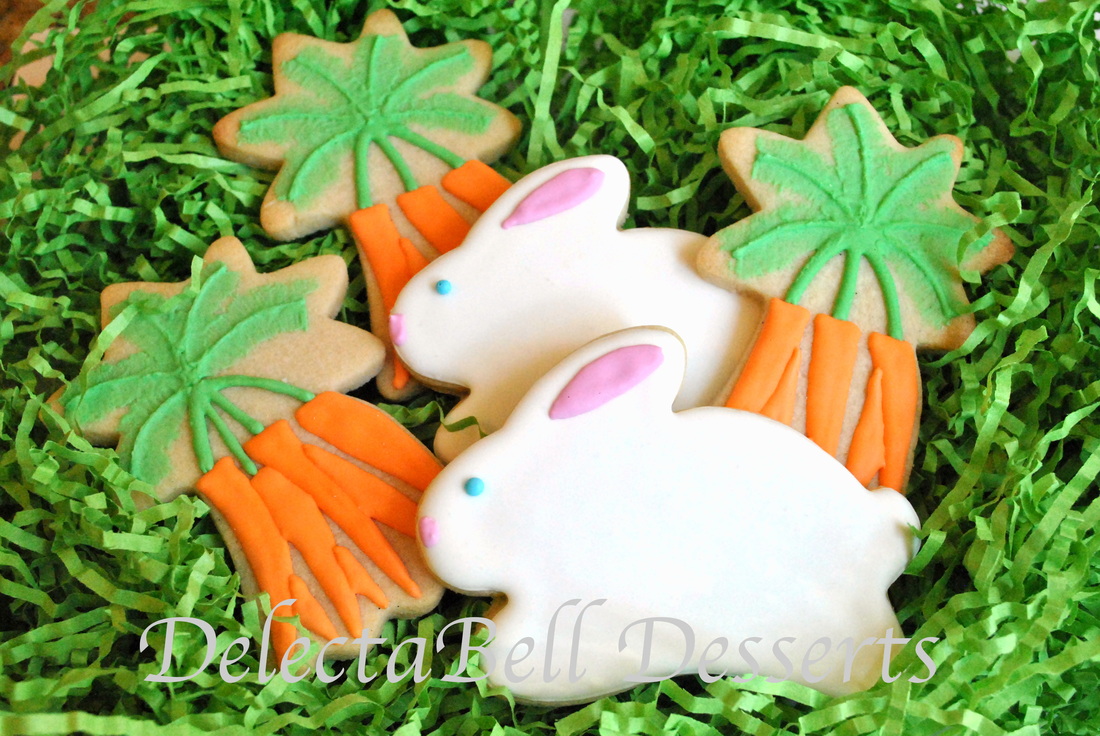
And with that, you have some super easy, super cute carrot bunches. Pair them with some hungry bunnies and they're perfect for anyone's Easter basket!(I have to add that I am using these for my submission to Lila Loa's March challenge. To change up my photography on this set I did a little playing around with pre-setting my white balance. I've never done that before, I usually just go with auto and edit on the computer. This time I actually used a white card and set that as the white balance in the camera. I also used the Easter grass instead of a plain, flat background. I'm pretty pleased!)
I'm sure most of y'all are like me, you love shopping for cute new cookie cutter. I don't have nearly as many as some people but my collection is definitely growing! But what do you do when you get a last minute order and you don't have the cutter you need? Most of us will really try to fit them into our schedule and want to do our best to make client happy. Many local stores carry cookie cutters but it seems like the last minute orders always require cutters they don't have. So do you buy a new cutter and pay a boat load in expedited shipping costs? That can really cut into your profit, personally, I'm not willing to pay $15 to get a $1.50 cookie cutter in two days when there are other options to work with.
So, lets talk about quick options to make the cookies your client needs:
1-make a template and hand cut the cookies
2-high jack a cutter you already have and think outside the box
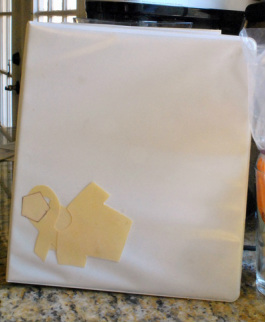
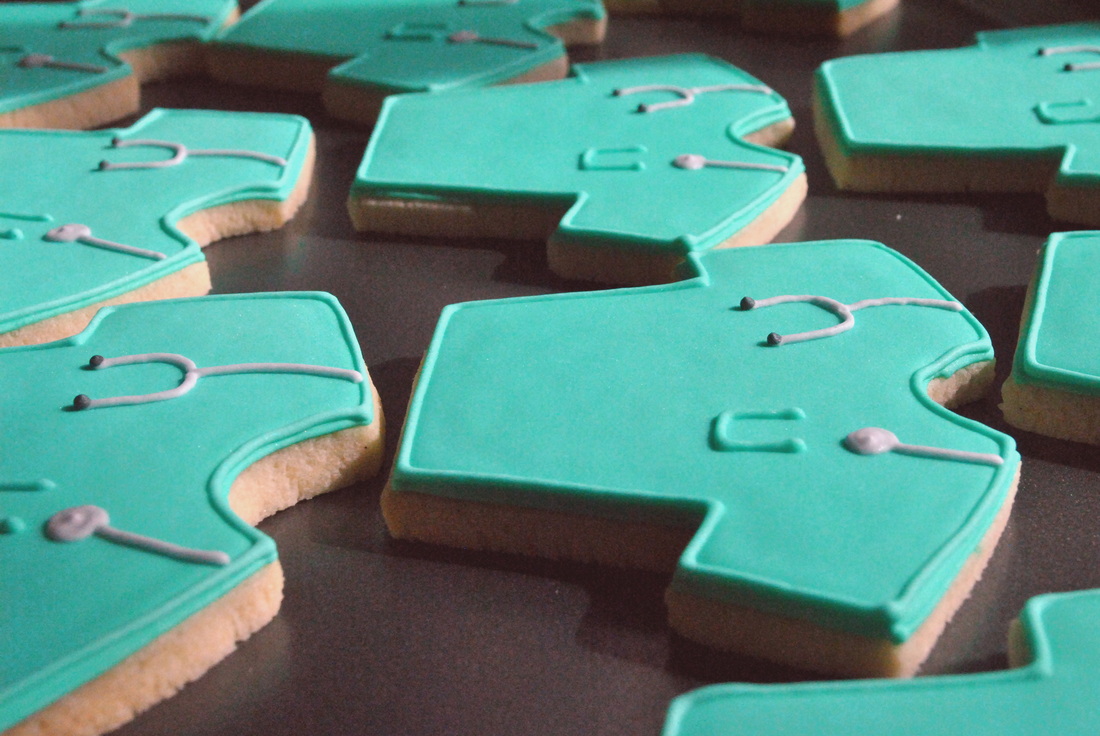
Option 1:We'll start with hand cutting. Bridget at Bake at 350 blogged about this and I've done it on more than one occasion. Basically, you draw the shape on something that is stiff, like a manilla folder, cut it out and then use that as your template. Place it on your rolled out cookie dough and use a good knife to cut around it. This is obviously waaaay more time consuming than using a cookie cutter but it works great! You can also save your template and re-use it as needed. If you read my last blog, you'll remember seeing some shapes in the front pocket of my Cookie Book. You can see the template in the above picture for my scrub shirt with stethoscope cookies, I have yet to find a cookie cutter that has dimensions that are to my liking. Yes, it takes a while to hand cut 3 dozen of these but in the end I am happier doing this than messing with a shape I don't really like.
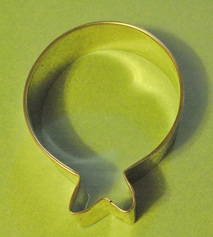
Option 2:The second option is to high-jack a cookie cutter you already have. Now, in my opinion Calleye over at The Sweet Adventures of Sugarbelle is the masters of this. She has an amazing ability to think outside the box and use the cutters that she already has in wonderfully creative ways. This is a talent I am trying to develop and I'll show you an example below.When I first picked up this cookie cutter from Sur la Table, I honestly thought it was a pomegranate. Seriously. My husband is an avid fruit grower (check out his incredible blog!) and I think at that time we had been enjoying the poms he grew. Anyway, I was going to make some fruit themed cookies for his friend and I saw this and thought "oh, wow! I can't believe they make a pomegranate shaped cookie cutter!"...it was in the same bin as the apple, pear etc cutters so it's a conclusion anyone would make, right? Unfortunately, I can't find any pictures of those cookies, but they didn't turn out how I wanted anyway, so maybe I just trashed them :) Anyway, if you can't tell by now, this is clearly supposed to be a balloon cookie cutter. (yes, it's a horrible picture, I'm using the excuse of kids being sick...that's always a valid excuse, right?) 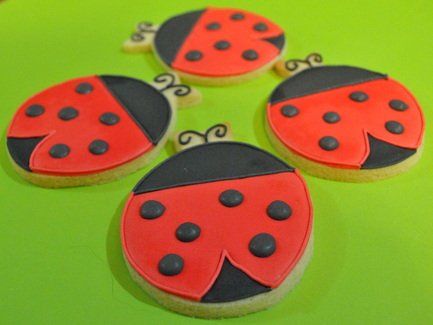 Ladybugs I was pleased with how they turned out but all I could think while cutting out the cookies was "these aren't ladybugs, clearly these are blowfish!". How convenient that my son's birthday party was coming up, he wanted a "shark party" but was happy with the idea of "sea creature" cookies to go along with it. Sharks, as it turns out, are hard for me...he's very understanding for a 4 year old. 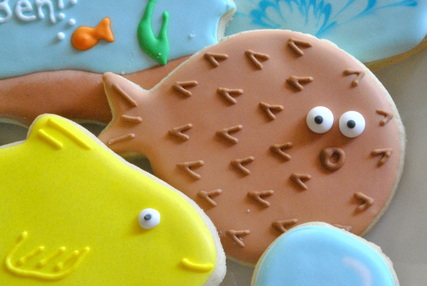 Blowfish cookie I decided that simple would be best for these cookies (this ends up being true for a lot of cookies). I flooded with brown icing, let him dry for the day and then added his spines and mouth using a slightly darker brown. Used a little white to pipe on some eyes and dot them with black icing while the white was still wet. Then I gave him wide eyes and a round mouth to make him look surprised at the fact that you might eat such an adorable little guy :)
Pomegranate, balloon, ladybug, blowfish, all from one 76 cent cookie cutter! The possibilities are really endless when you use your imagination. As I said before, I'm still a relative newbie to all of this and am still working on stretching my imagination with it comes to these things. Hopefully I'll have more fun with this cutter in the future!
Now it's your turn: how have you used your cookie cutters to make something new? Feel free to post a link to your blog to show off your work!
When I first discovered my love of decorating cookies I was constantly scouring the internet for all the beautiful creations that are out there. Actually, I guess I still spend a significant amount of time doing that! If y'all want to see some really spectacular cookies, head on over to The Adventures of Sweet Sugar Belle, Lila Loa, SweetAmbs or Bake at 350. Those are just a few of my favorites.
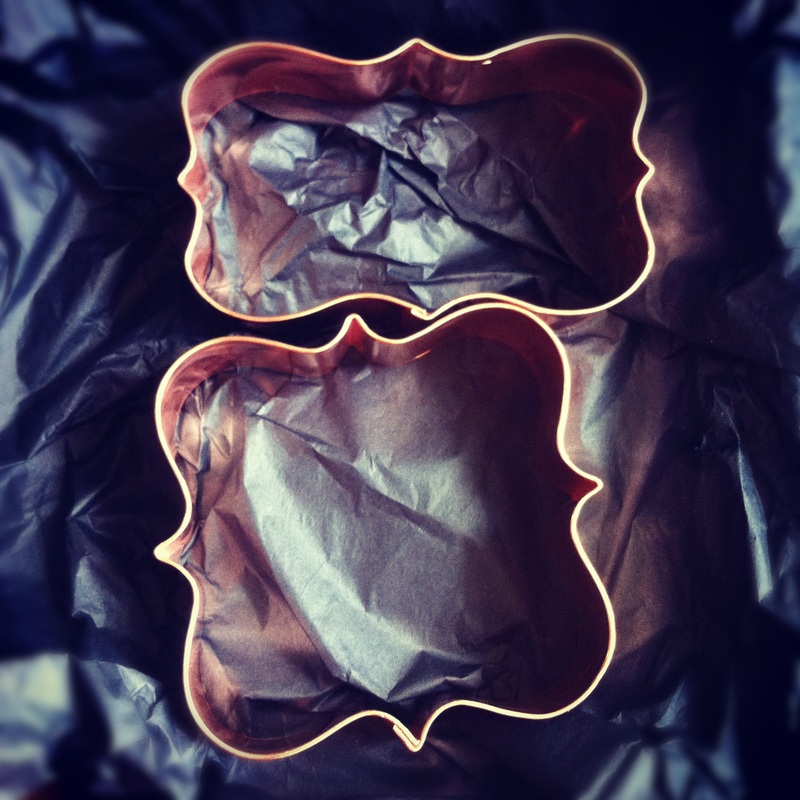
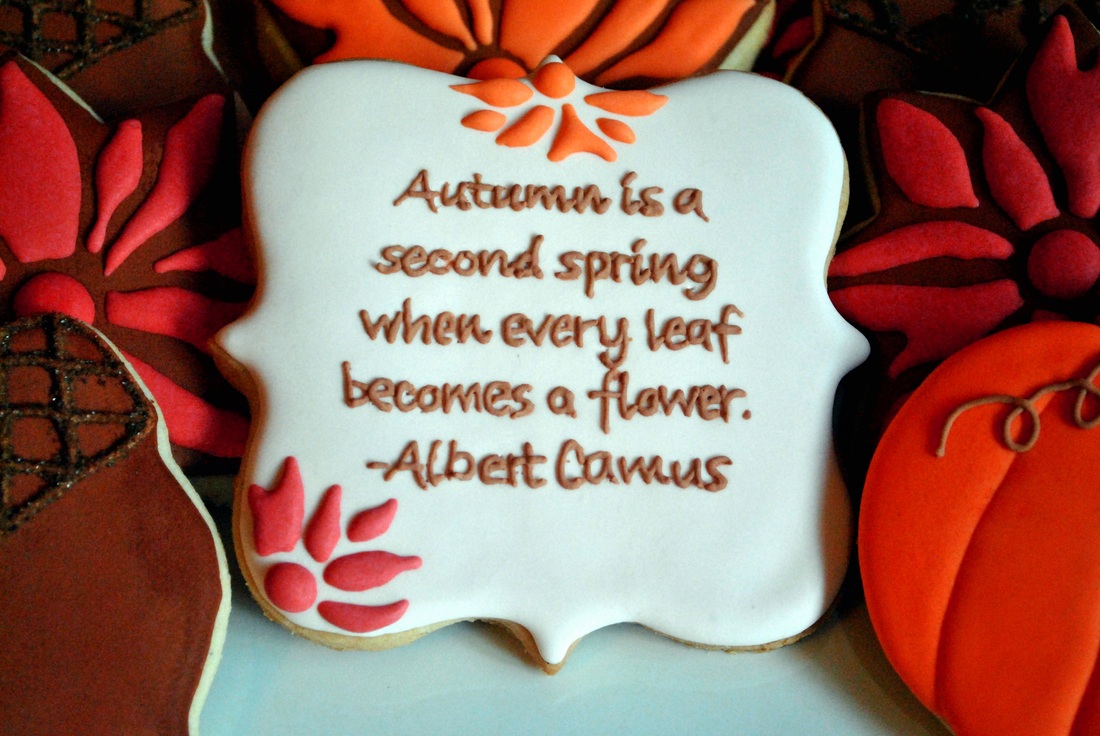
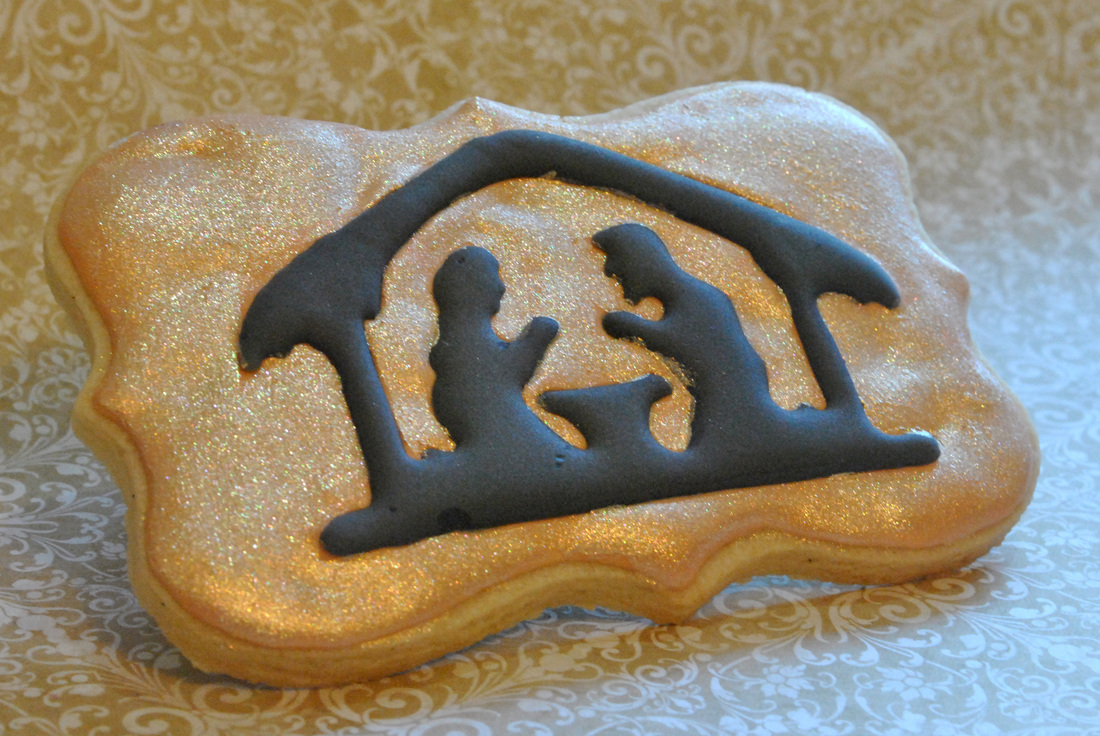
Anyway, one of things that I noticed was that there were a few cookie cutter shapes that kept popping up and made the most beautiful cookies; call them plaques, fancy square/rectangles or whatever you like, but they can really make your cookie 'pop'. They are super versatile and I could literally use them in every order that I make! The ones below were purchased from Copper Gifts, they have high quality copper cutter but that does mean they are a bit pricey. Another great option are the ones available at Karen's Cookies, they are not copper so they are a lot cheaper. Karen's is my go-to site for new cutters, tips and pretty much all cookie-ing supplies. You might be thinking "Sure, those are a pretty shape, prettier than a regular old square or rectangle, but do they really make a difference?". Let's take a look, shall we? See?! While I really liked the first cookie I did with the quote on it, I knew it was lacking. Then my beautiful copper fancy cutters arrived and I just had to have another go. The fancy square adds visual interest without distracting from all your detailed decorating. I really like them to put front and center for a cookie platter as well, it breaks up the monotony of only one or two cookie designs and allows you make the platter a little more special. And really, who doesn't like a cookie with a personalized message on it? So what do you think, would the above cookies look as good if I'd used a plain square and rectangle? I think these cutters make them look more like they are in a picture frame instead of just on a cookie. And really, with all the hard work you put into decorating cookies, you want to display them to their best advantage!Now, head on over to Copper Gifts or Karen's Cookies and order your own fancy shapes!
(I should disclose that I was not asked to promote these products or am I getting anything in return, I just truly love these cutters and wanted to share them with y'all!)
|


 RSS Feed